How to Apply Primer for Epoxy Flooring: A Step-by-Step Guide
How to Apply Primer for Epoxy Flooring: A Step-by-Step Guide. Ready to transform your drab concrete slab into a stunning, durable epoxy masterpiece? Then you’ve stumbled upon the crucial first step: priming! Think of epoxy primer as the secret handshake between your concrete and the epoxy. It ensures a bond so strong it could withstand a stampede of elephants (or, you know, just really heavy foot traffic).
This isn’t just about slapping some construction chemicals on the floor; it’s a process that guarantees durability of your flooring. In this guide, we’ll demystify the priming process, breaking it down into easy-to-follow steps, so even if you’ve never held a paintbrush before, you’ll be priming like a pro in no time.
Prepare the surface
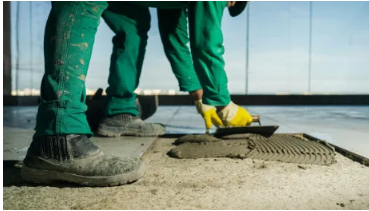
Preparing the surface you’ll be putting the primer on is paramount. If anything, it’s the most important step. If you skip this step, fixing the floor after the primer and epoxy have been applied can result in even more costly do-overs.
Remember the surface has to have a slightly rough texture before applying your primer. This will ensure that there’s enough mechanical bond between the epoxy primer and concrete. If anything else, make sure your blank canvas is also clean and free from any dust, chemicals, oils, or other materials that may affect the primer from sticking properly.
Choose the right primer
Remember: not all primers are created equal. Choosing the right primer is like choosing the right shoes to wear for your first marathon. It can make or break the entire experience! Different epoxy systems require different primers, so make sure to check the manufacturer’s instructions before blatantly coating your floors.
Take note that some primers are design for specific types of concrete, while others serve more generic purposes. Do your research and choose wisely. Just think of it as a matchmaking process—you need to find the perfect primer partner that will go well with your epoxy.
Mix the primer
Now onto the (somewhat) fun part—mixing the primer! Most epoxy primers come in two parts: a resin and a hardener. It’s like a science experiment, but way more practical. Carefully follow the manufacturer’s instructions for mixing ratios.
Too much of one or the other can mess up the chemical reaction and lead to a sticky situation (literally!). If you can, make sure you use a mixing drill with a paddle attachment for larger projects. Trust me, it’ll save you a lot of time and elbow grease! Mix thoroughly until the primer is completely blended and uniform.
Application
Now grab your trusty roller or brush (depending on the size of your project) and get ready to create some magic! Start by cutting in around the edges of the room with a small brush. This is like outlining your drawing before you start coloring it in.
Then, use a roller to apply the primer to the rest of the big spaces on the floor. Make sure to work in small sections and maintain a “wet edge” to avoid lap marks. Don’t be afraid to get a little creative, but remember to keep the coat thin and even. Too much primer can actually be a bad thing, so less is often more.
Wait then inspect
Once the primer’s on, consult the manufacturer’s instructions for drying time. This one’s super important! Don’t rush, just wait for it to dry and keep the area clean at all times.
Once it’s completely dry, inspect the surface. Look for missed spots or thin areas needing a second coat. If everything looks smooth and ready, congratulations! You’ve primed like a pro, one step closer to your epoxy masterpiece. Now, conquer that epoxy!